

Video
If you completed the Quality stage, (not necessarily
including the purple sections)
scroll down to the
orange sections.
If you skipped the Quality stage, ignore the orange
sections.
Go to the Start menu and open
 VirtualDubMod.
Click  if there is a warning.
From the
 menu, select
 .
.
Navigate to the ripping folder and open
![]() script.avs.
script.avs.

Drag the 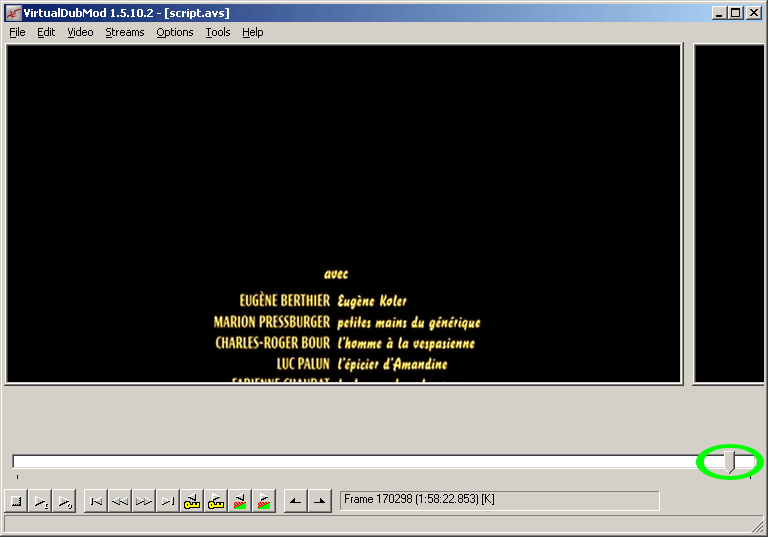 to different locations within the
end credits. If they are plain text-only credits, open
to different locations within the
end credits. If they are plain text-only credits, open
![]() video notes.txt and
type in the line credits begin:________.
Fill in the blank with the
frame number
where the credits begin.
video notes.txt and
type in the line credits begin:________.
Fill in the blank with the
frame number
where the credits begin.
If the credits are anything more complicated than regular
scrolling text on a plain background, don't bother to make
a note. If you are encoding a series of episodes, don't
bother to make a note.
IMPORTANT: At this point you must make
sure the picture looks good.
Drag the  to different locations in order to
check the picture for brightness, saturation, and
black borders. If it is too bright, edit
to different locations in order to
check the picture for brightness, saturation, and
black borders. If it is too bright, edit
![]() script.avs to
decrease the
YlevelsS brightness value. (The default is
1.2.) If the picture is not bright enough,
increase that value.
script.avs to
decrease the
YlevelsS brightness value. (The default is
1.2.) If the picture is not bright enough,
increase that value.
If the picture looks washed-out, increase the
Tweak saturation level. (The
default value is 1.2.) If the picture is too
colorful, with lots of loud reds/greens/blues, decrease the
saturation.
If any black borders are visible, go back to the Script
stage and increase the relevant cropping values. (Check the
right side of the image carefully--Gordian Knot sometimes
leaves a border there that is not apparent during the
Script stage.) If the picture is squashed or stretched,
that's fine--as long as you carefully followed the
directions in the Script stage.
Always save ![]() script.avs and
re-open it in
script.avs and
re-open it in  VirtualDubMod after editing, so you can
see how your changes have affected the picture. When
it looks good, continue below.
VirtualDubMod after editing, so you can
see how your changes have affected the picture. When
it looks good, continue below.
From the
 menu, select
 .
.
In the video compression menu, select
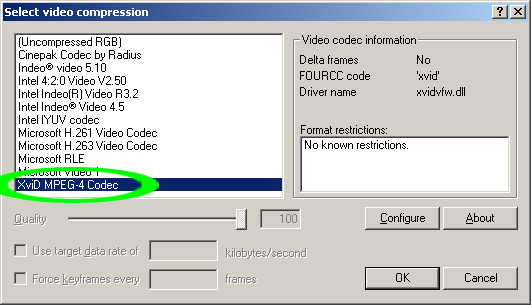 .
.
Click
 .
.
Click
 .
.
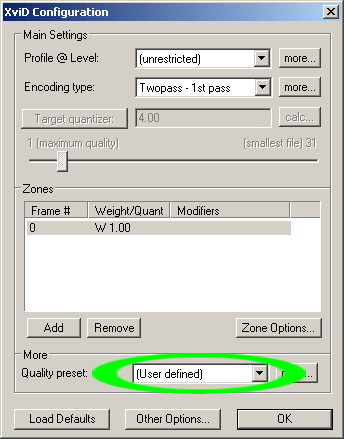
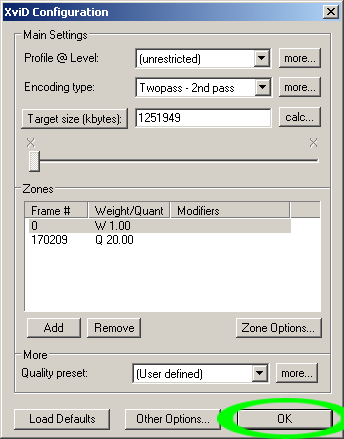
From the "Encoding type" menu, select
 .
.
Click the
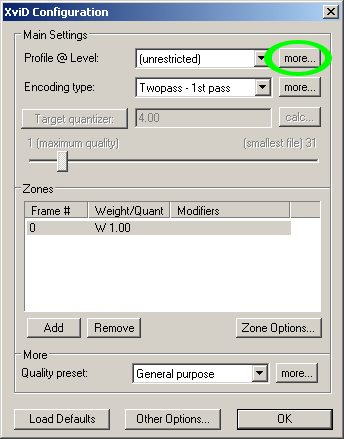 button next to
 .
.
If you are using 1 CD or encoding a
series of episodes, skip past the
white section.
From the "Quantization type" menu, select
 .
.
Click  .
.
Click  .
.
Navigate to C:\Program
Files\GordianKnot\qmatrix.
If you are using 2 CDs, select
![]() HVS Best
Picture.cqm.
HVS Best
Picture.cqm.
If you are using 3 CDs, select
![]() Didees
SixOfNine-HVS.cqm.
Didees
SixOfNine-HVS.cqm.
Click
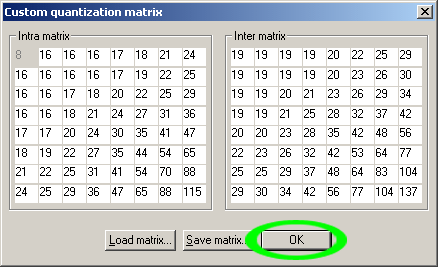 .
.

Check  .
.
Uncheck
 .
.
Click
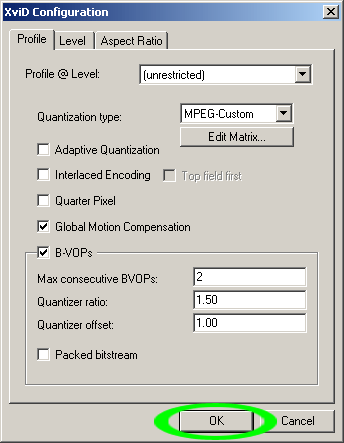 .
.
From the "Quality preset" menu select
 .
.
Click the  button next to the
"Quality preset" menu.
button next to the
"Quality preset" menu.
From the "VHQ Mode" menu, select
 .
.
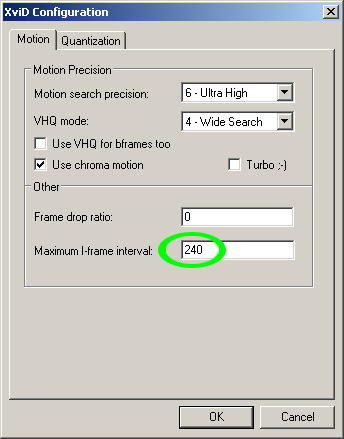 if the DVD
is telecined
NTSC.
if the DVD
is telecined
NTSC.
 if the DVD
is PAL.
if the DVD
is PAL.
 if the DVD
is regular or
interlaced
NTSC.
if the DVD
is regular or
interlaced
NTSC.
Click
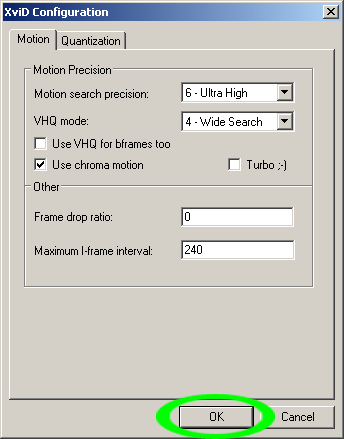 .
.
If the end credits were composed of simple text on a
plain background, follow the instructions in the
gray section.
If the end credits were more complicated, or if you are
encoding a series of episodes rather than a feature length
movie, ignore the gray section.
Click
 .
.
Highlight the newly created zone and click
 .
.
Copy the "credits begin" frame number from
![]() video notes.txt and
paste it in:
video notes.txt and
paste it in:
 .
.
Select
 and enter a value of
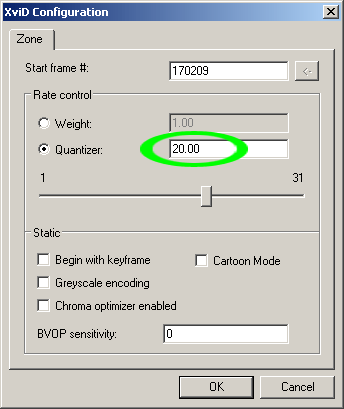 .
.
Click
 .
.

Click
 on the
configuration screen.
on the
configuration screen.
Click
 on the
compression screen.
on the
compression screen.
Go to the
 menu and select
 .
.
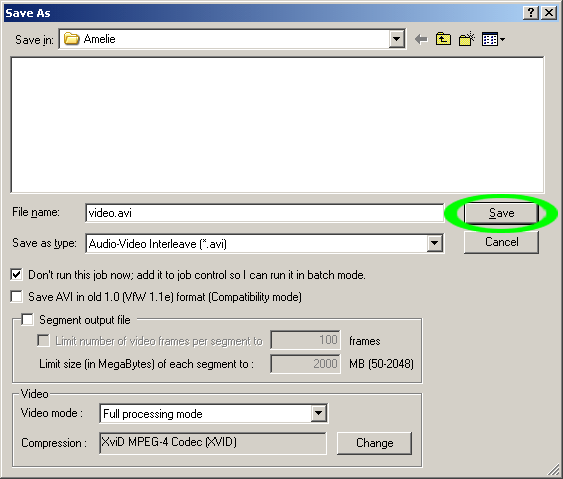
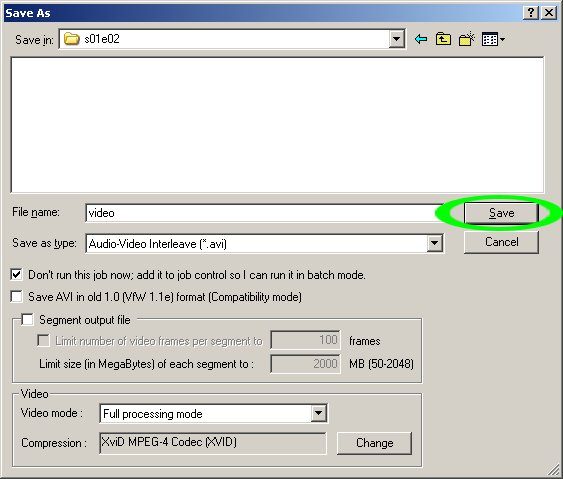
Check
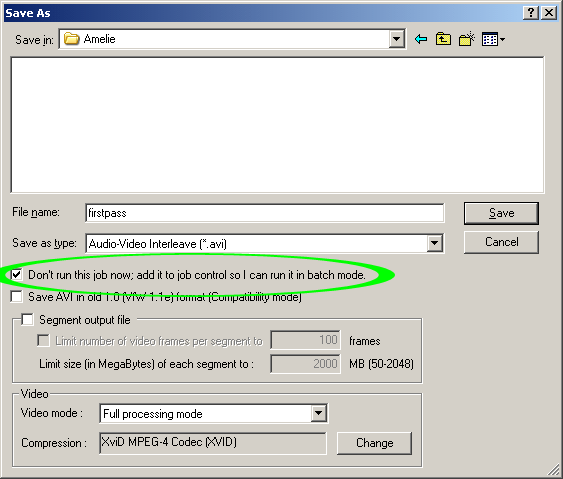
Navigate to the ripping folder, and name the file
firstpass.avi.
Click  .
.
Skip past the orange sections.
If
you completed the Quality stage, begin
here.
Go to the Start menu and open
VirtualDubMod.
From the
menu, select
.
Navigate to the ripping folder and open
![]() script.avs.
script.avs.
From the
menu, select
.
In the video compression menu, select
.
Click
.
From the "Encoding type" menu, select
 .
.
If you are encoding a series of episodes, follow the
instructions in the brown
sections.
If you are encoding a feature length movie, ignore the
brown sections.
If you completed the
Quality stage,
Click the
 button next to
 .
.
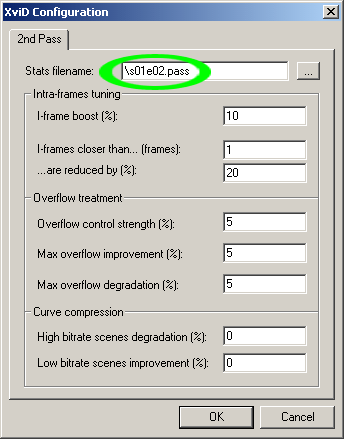
Rename video.pass to correspond to the episode
number:

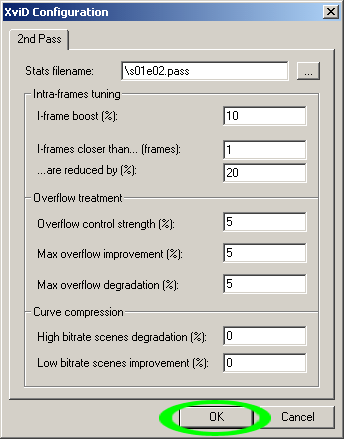
Click
 on the 2nd Pass
screen.
on the 2nd Pass
screen.
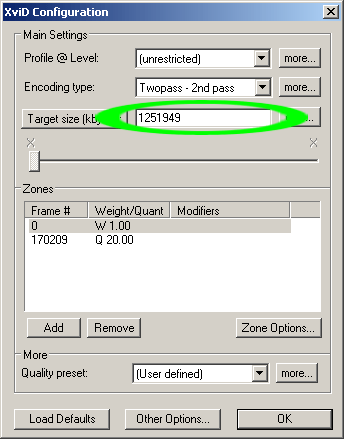
Open ![]() video
notes.txt.
video
notes.txt.
Copy and paste the file size value into the "Target size"
field:
Click
 on the
configuration screen.
on the
configuration screen.
Click
on the
compression screen.
Go to the
menu and select
.
Name the file video.avi.
Check
Click
If you completed the
Quality stage,
go to the
menu and select
.
Navigate to the ripping folder for the second
episode and open ![]() script.avs.
script.avs.
From the
menu, select
.
Click
.
Bring up ![]() video
notes.txt.
video
notes.txt.
Copy and paste the file size value for the second
episode into the "Target size" field:

Click the
 button next to
.
button next to
.
Rename video.pass to correspond to the episode
number:
Click
 on the 2nd Pass
screen.
on the 2nd Pass
screen.
Click
 on the
configuration screen.
on the
configuration screen.
Click
on the
compression screen.
Go to the
menu and select
.
Navigate to the ripping folder for the second
episode and name the file video.avi.
Click
Repeat for the third episode, fourth, etc., until all have
been processed.
If you did not
complete the Quality stage,
go to the
menu and select
.
Navigate to the ripping folder for the second
episode and open ![]() script.avs.
script.avs.
From the
menu, select
.
Click
.
From the "Encoding type" menu, select
.
Click
 on the
configuration screen.
on the
configuration screen.
Click
on the
compression screen.
Go to the
menu and select
.
Navigate to the ripping folder for the second
episode, and name the file firstpass.avi.
Click .
From the
menu, select
.
Click
.
From the "Encoding type" menu, select

The target size should still be the same from
before.
Click
on the
configuration screen.
Click
on the
compression screen.
Go to the
menu and select
.
Navigate to the ripping folder for the second
episode and name the file video.avi.
Click
.
Repeat for the third episode, fourth, etc., until all have
been processed.
From the
menu, select
 .
.
When you're ready to begin encoding, click
 .
.
If you're encoding a feature length movie, VirtualDubMod
will create or access the ![]() video.pass file
located in the root directory. Do not delete this
file!
video.pass file
located in the root directory. Do not delete this
file!
The first encoding pass can take up to 8 hours for a
feature length movie, and the second pass can take up to 24
hours, depending on the speed of your CPU and the length of
the movie.
If you completed the Quality stage, you
will have a number of ![]() s__e__.pass files in
the root directory. Do not delete them!
s__e__.pass files in
the root directory. Do not delete them!
If you did not complete the Quality stage, you will have a
single ![]() video.pass file in
the root directory. Do not delete it!
video.pass file in
the root directory. Do not delete it!
After the first ![]() video.avi file has
been encoded, check it to make sure the size is
correct. Open it in
video.avi file has
been encoded, check it to make sure the size is
correct. Open it in ![]() Media
Player Classic to make sure there are no
problems. If there are, cancel the other jobs in the
queue and try again.
Media
Player Classic to make sure there are no
problems. If there are, cancel the other jobs in the
queue and try again.
When encoding finishes, check the job control screen for
warnings. Double-click the job for specifics. Disregard any
"possible livelock" warnings.
Click
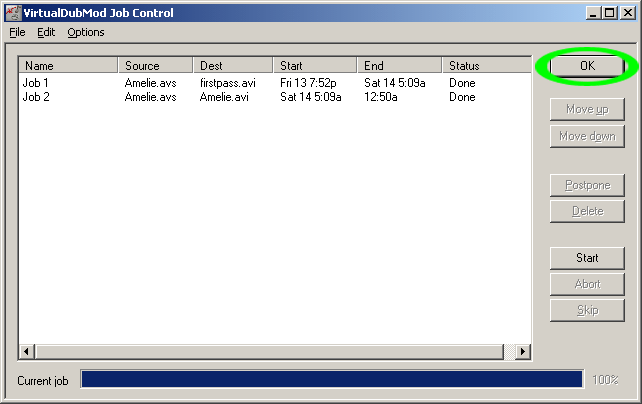 .
.
The resulting ![]() video.avi file(s)
should be within a few hundred KB of the specified
size. If you skipped the Quality stage and there is a
small firstpass.avi file, you can delete it.
video.avi file(s)
should be within a few hundred KB of the specified
size. If you skipped the Quality stage and there is a
small firstpass.avi file, you can delete it.

Close VirtualDubMod and proceed to the next stage.
.

