

Script
Go to the Start menu and open
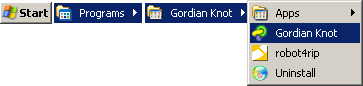 Gordian
Knot.
Gordian
Knot.
Select your language and click
 .
.
Click  and navigate
to the ripping folder.
and navigate
to the ripping folder.
Open ![]() decoded.d2v
decoded.d2v
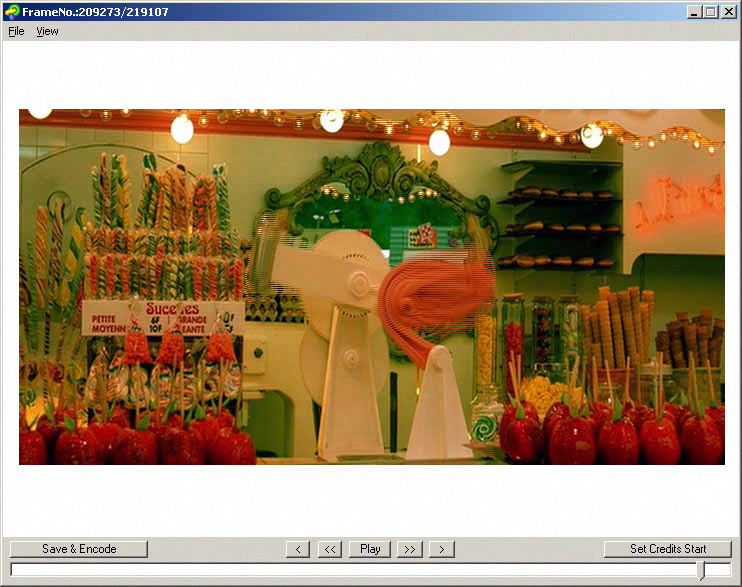
A preview display window will
appear. Minimize it, but do not close it.

Select
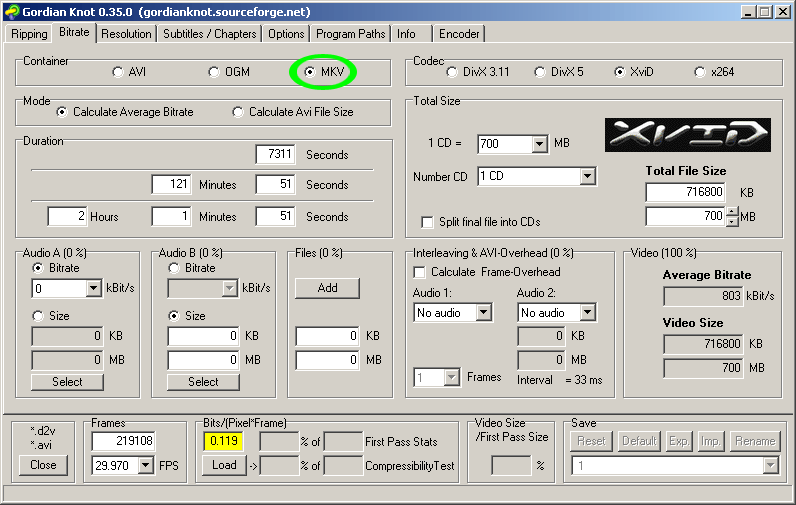 .
.
Click
 in the
Audio A section, and choose
in the
Audio A section, and choose ![]() main.ogg.
main.ogg.
If you have a ![]() commentary.ogg file,
commentary.ogg file,
 it in the
Audio B section.
it in the
Audio B section.
For any additional audio files,
 them one at a time in the Files
section.
them one at a time in the Files
section.
If you are encoding a feature length movie on 1
CD, select
 .
.
If you are encoding a feature length movie on 2
CDs, select
 .
.
If you have performed a compression test and determined
that 3 CDs are necessary for your feature length movie,
select 3 CD.
If you are encoding a series of episodes, select the
fraction that will result in about 90 minutes of material
per CD. For example, if the episodes are 30 minutes long,
select
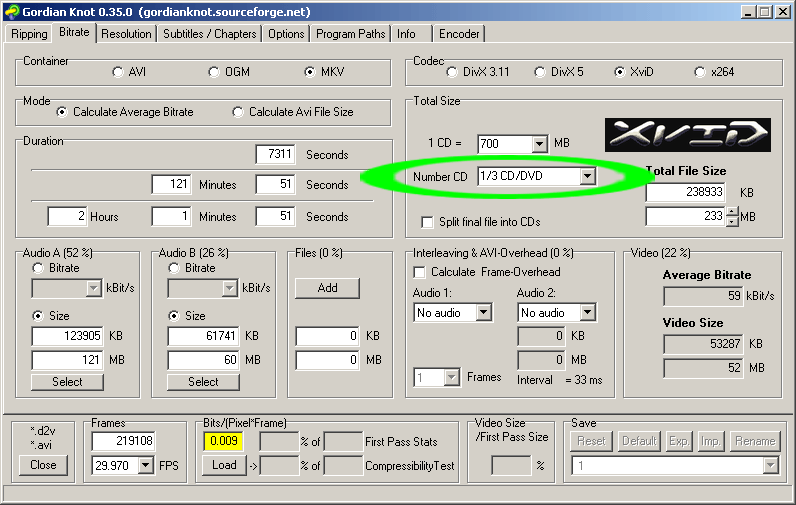 .
.
Select

If you have a commentary track, select
 as well.
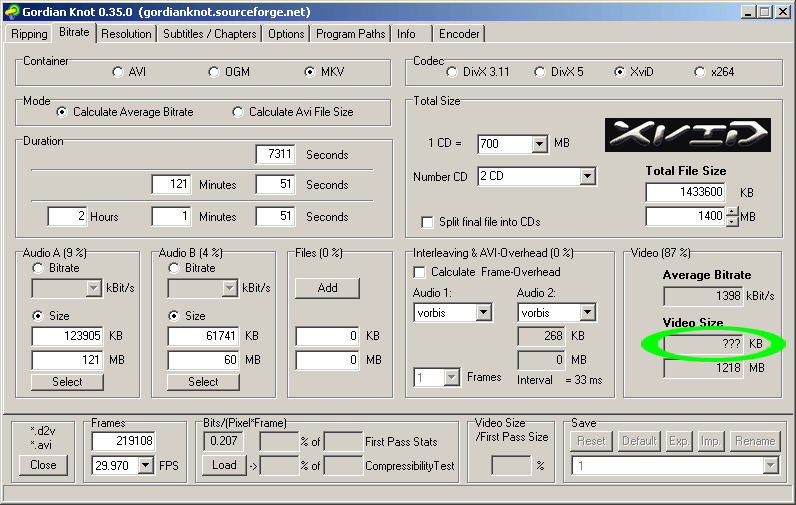
Create a new text file in the ripping folder, and name
it video notes.txt.
Open ![]() video notes.txt and
type in the line video size:________,
filling in the blank with the
Video Size value
from Gordian Knot. Save and minimize.
video notes.txt and
type in the line video size:________,
filling in the blank with the
Video Size value
from Gordian Knot. Save and minimize.
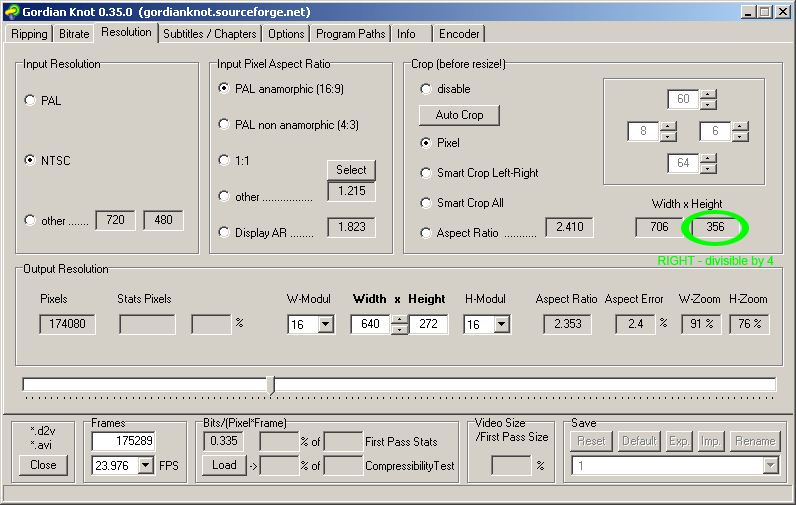
Go to the
 tab.
tab.
In the "Input Resolution" section select
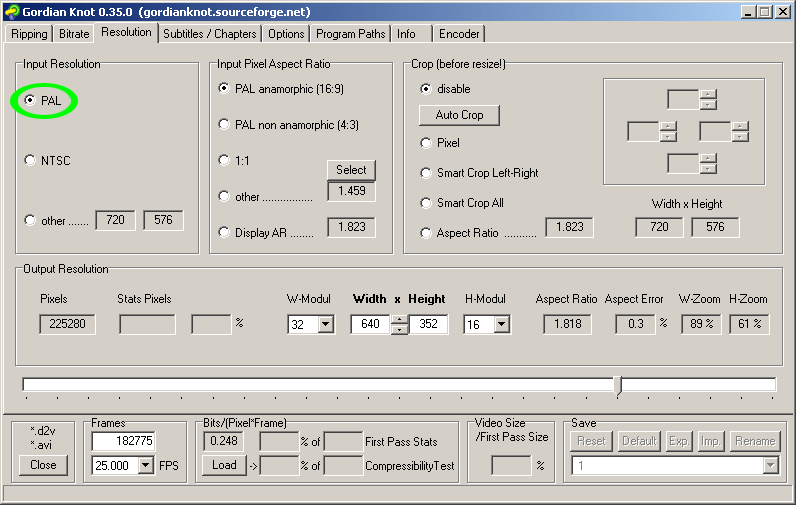
or
 ,
,
depending on how the DVD is labeled and
where
it came from.
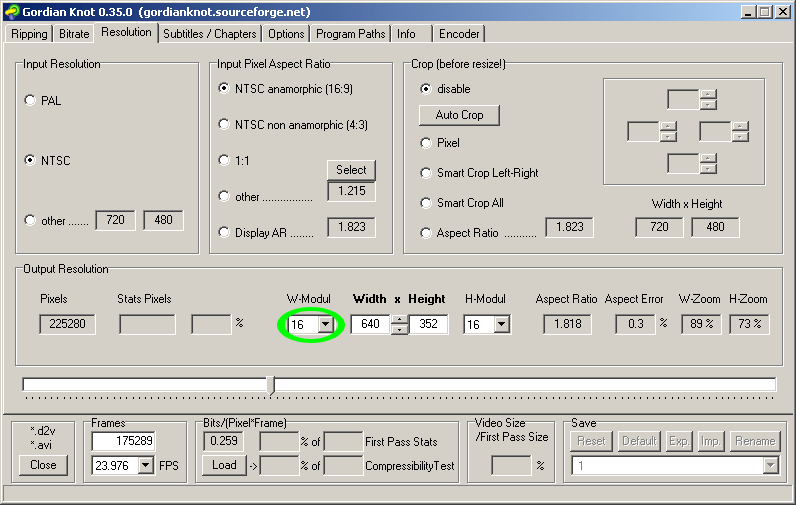
If the picture shape of the original video is
 widescreen, select
 .
.
Bring up ![]() video notes.txt and
add the line aspect ratio 2.35:1, then
save.
video notes.txt and
add the line aspect ratio 2.35:1, then
save.
If the picture shape of the original video is
 widescreen, select
.
widescreen, select
.
Bring up ![]() video notes.txt and
add the line aspect ratio 16:9, then
save.
video notes.txt and
add the line aspect ratio 16:9, then
save.
If the picture shape of the original video is
 fullscreen, select
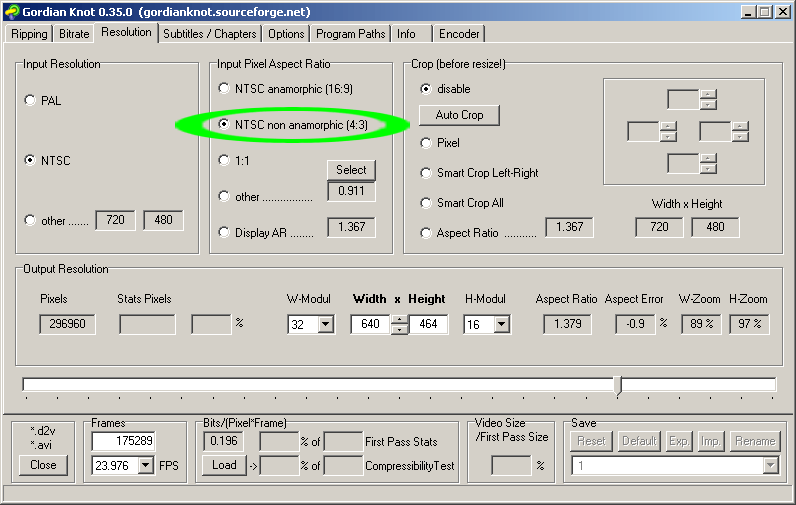 .
.
Select
Select
![]() , and
then click
, and
then click
 .
.
Wait for a few moments while Gordian Knot removes the
black borders from the picture.
Bring up the preview
display window again.
Drag the slider to various points and check to make sure
all black borders have been cropped away. (If any remain,
manually adjust them in the
cropping section, but do not
allow the Aspect Error to
exceed ±3%.)
IMPORTANT: Make sure the source
width and
height are each divisible
by 4. (This is really only necessary for the 1 CD
script below, but it won't cause a problem with 2 CD
script.) Increase the relevant cropping value(s) if
necessary.
From the
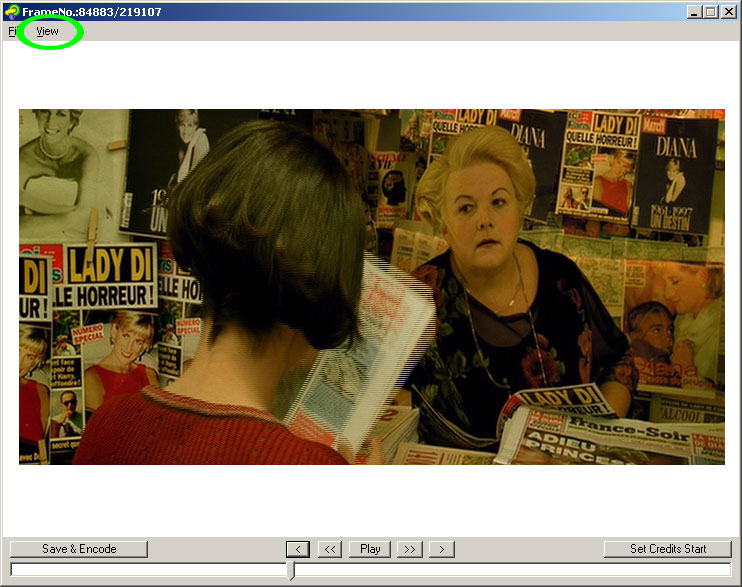 menu on the preview
display window, select
menu on the preview
display window, select
 .
.
Check the picture. Is
it squashed or stretched? If so, the aspect ratio may be
wrong.
In some cases, (especially with cheap DVDs) a movie with a
or widescreen picture will actually have
a 4:3 aspect ratio on the disc. If this is true of
your DVD, select  to get the proper picture shape. Also, bring up
![]() video notes.txt and
delete the aspect ratio line.
video notes.txt and
delete the aspect ratio line.
Repeatedly click the
 button on the preview display window. Look for a
pattern in the appearance of frames with
interlacing artifacts.
These frames will appear during scenes with a lot of
motion on the screen.
button on the preview display window. Look for a
pattern in the appearance of frames with
interlacing artifacts.
These frames will appear during scenes with a lot of
motion on the screen.
Is the pattern "3 normal, 2 interlaced", or are they all
interlaced? If there is a pattern, follow
the instructions in the
blue sections. If they
are all interlaced, follow the
instructions in the
green sections. If
every frame looks normal, ignore the colored sections
altogether.
Minimize the preview display window and go back to the main program.
If the video is
telecined,
Make sure
 is selected in the
Frames section, and continue.
is selected in the
Frames section, and continue.
If  is currently selected, change it to
 instead. This will
distort the picture, but we will adjust for it at a
later stage.
instead. This will
distort the picture, but we will adjust for it at a
later stage.
If you are using 1 CD or encoding a
series of episodes, move the
 until the
Bits/(Pixel*Frame)
value is as close to 0.200 as possible. It can be
slightly higher or lower, as long as it is
close.
until the
Bits/(Pixel*Frame)
value is as close to 0.200 as possible. It can be
slightly higher or lower, as long as it is
close.
If you are using 2 CDs, move the
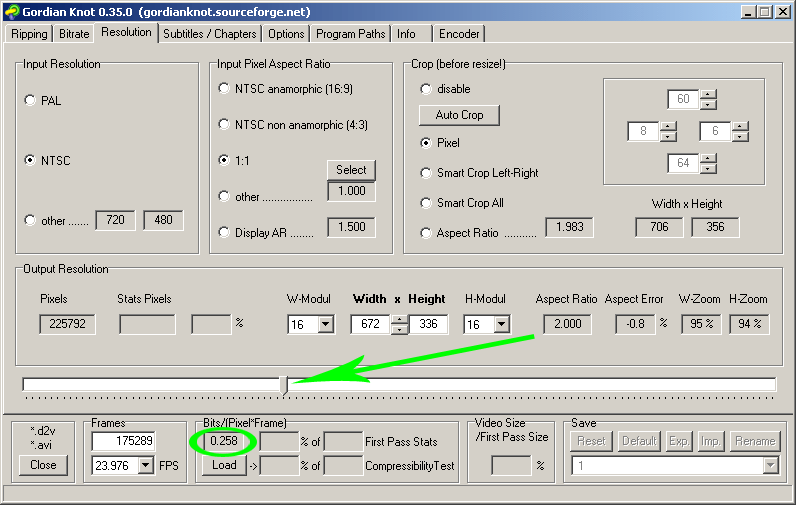 until the
Bits/(Pixel*Frame)
value is as close to 0.250 as possible. It can be
slightly higher or lower, as long as it is
close.
until the
Bits/(Pixel*Frame)
value is as close to 0.250 as possible. It can be
slightly higher or lower, as long as it is
close.
If you are returning to this stage after having done a
compression test, and you have determined that you need
3 CDs, use a Bits/(Pixel*Frame) value of
0.300.
Bring up the preview display window.
Click
 .
.
Click  .
.
Create another new ![]() text file in the ripping folder,
and open it.
text file in the ripping folder,
and open it.
If you are using 1 CD or encoding a
series of episodes, paste in the following:
Import("C:\PROGRA~1\GORDIA~1\AVISYN~1\Hybridfupp.avsi")
Import("C:\PROGRA~1\GORDIA~1\AVISYN~1\Ylevels.avsi")
LoadPlugin("C:\PROGRA~1\GORDIA~1\DGMPGDec\DGDecode.dll")
LoadPlugin("C:\PROGRA~1\GORDIA~1\AVISYN~1\decomb.dll")
LoadPlugin("C:\PROGRA~1\GORDIA~1\AVISYN~1\Deen.dll")
LoadPlugin("C:\PROGRA~1\GORDIA~1\AVISYN~1\Masktools.dll")
LoadPlugin("C:\PROGRA~1\GORDIA~1\AVISYN~1\msharpen.dll")
LoadPlugin("C:\PROGRA~1\GORDIA~1\AVISYN~1\MVTools.dll")
LoadPlugin("C:\PROGRA~1\GORDIA~1\AVISYN~1\UnFilter.dll")
mpeg2source("DRIVE:\PATH\decoded.d2v")
#
crop(CROPPING
VALUES)
YlevelsS(0,1.2,255,0,255)
Tweak(sat=1.2)
HybridFuPP(RESIZING
VALUES)
If you are using 2 or more CDs, paste
in the following:
Import("C:\PROGRA~1\GORDIA~1\AVISYN~1\Ylevels.avsi")
LoadPlugin("C:\PROGRA~1\GORDIA~1\DGMPGDec\DGDecode.dll")
LoadPlugin("C:\PROGRA~1\GORDIA~1\AVISYN~1\decomb.dll")
LoadPlugin("C:\PROGRA~1\GORDIA~1\AVISYN~1\Masktools.dll")
LoadPlugin("C:\PROGRA~1\GORDIA~1\AVISYN~1\UnDot.dll")
LoadPlugin("C:\PROGRA~1\GORDIA~1\AVISYN~1\Deen.dll")
LoadPlugin("C:\PROGRA~1\GORDIA~1\AVISYN~1\asharp.dll")
mpeg2source("DRIVE:\PATH\decoded.d2v")
#
crop(CROPPING
VALUES)
BicubicResize(RESIZING
VALUES,0,0.5)
YlevelsS(0,1.2,255,0,255)
Tweak(sat=1.2)
Undot()
Deen("a3d",1,3,5)
asharp(1,2)
Replace the red text with the
SOURCE path from Gordian
Knot.
Replace the green text with the
CROPPING values from
Gordian Knot.
Replace the blue text with the
RESIZING values from
Gordian Knot.
If the video is
telecined,
replace the # symbol with the line
Telecide(order=1,guide=1).Decimate()
If the video is
interlaced,
replace the # symbol with the line
FieldDeinterlace()
If the video is neither interlaced nor telecined, you can leave the # symbol in.
Save the file in Notepad, close it, and rename it
![]() script.avs
script.avs
If you are encoding a series of episodes, follow the
instructions in the brown
section.
If you are encoding a feature-length movie, ignore the
brown section.
Copy ![]() script.avs and paste
it into the second episode folder.
script.avs and paste
it into the second episode folder.
Open this duplicate ![]() script.avs with
Notepad.
script.avs with
Notepad.
Edit the SOURCE path so it points to the second
episode. The other settings should remain the same. Save
the file and close it.
Repeat this process until there is a unique script file in
the ripping folder of each and every episode.

Close Gordian Knot and proceed to the next stage.
.

