

Audio
Go to the Start menu and open
 BeSweet.
At the Startup prompt, click
 .
.
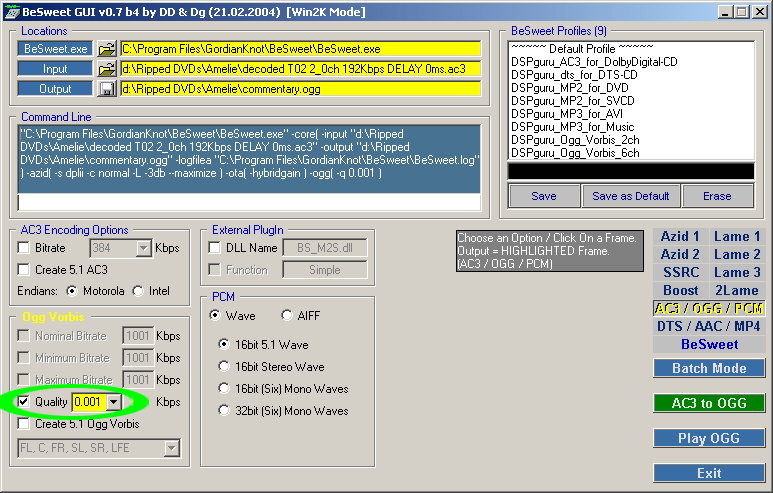
Check  .
.
Click  .
.
Click the
 folder button.
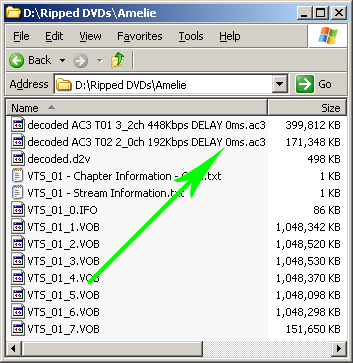
Navigate to the ripping folder.
Select
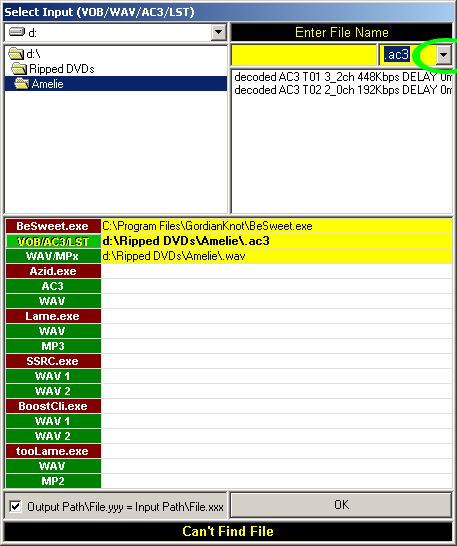 , then double-click the
.ac3 file you want to encode.
, then double-click the
.ac3 file you want to encode.
Click
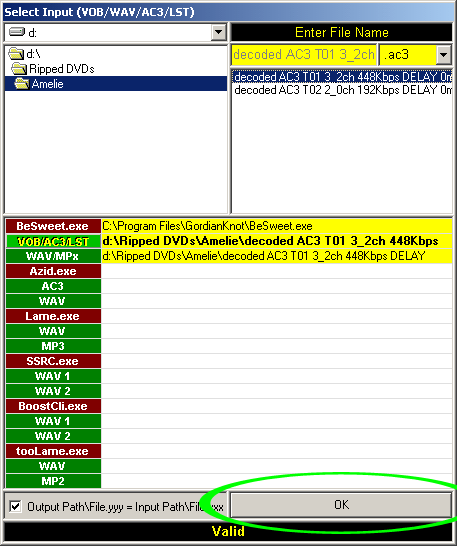 .
.
Select "DSPguru_Ogg_Vorbis_2ch" from the profiles menu.
Click the
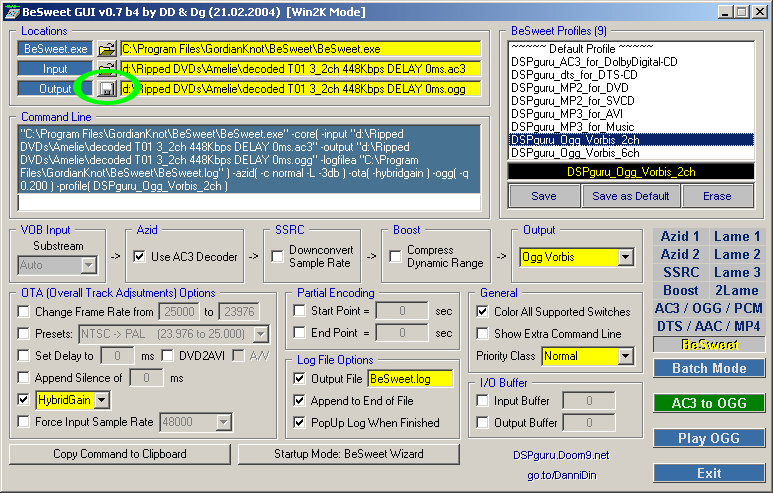 floppy disc
button.
floppy disc
button.
If you are encoding the main soundtrack, name the file
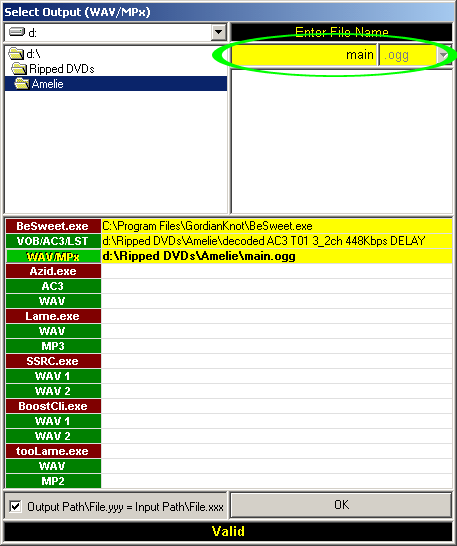 .
.
If you are encoding a commentary track, name the file
 .
.
If you are encoding some other track, give it a similarly
descriptive name.
Click
 .
.
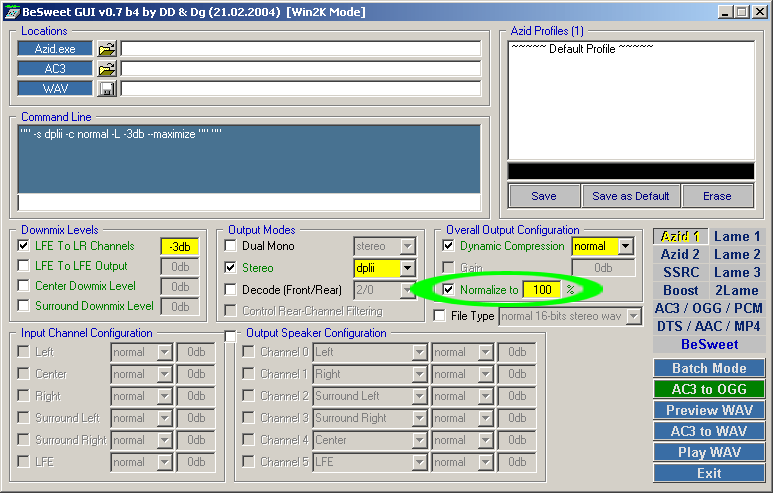
Check
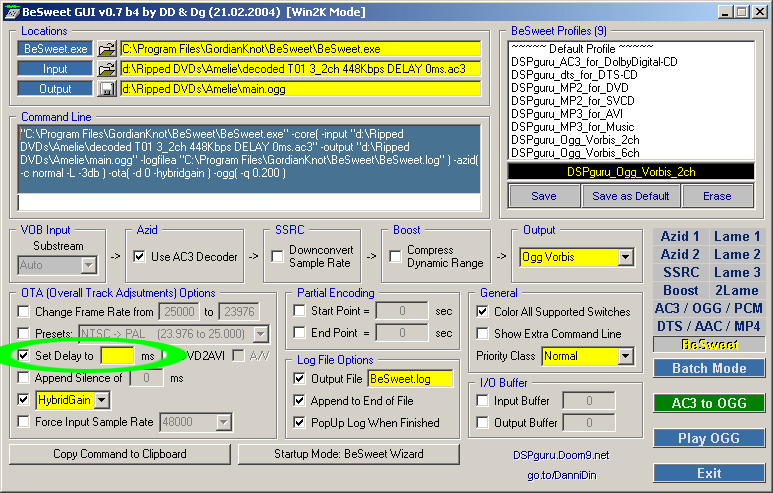
Enter the Delay value found in
the name of the .ac3 file exactly as it appears. It may
be positive or negative.
(If the value is 0ms, remove the check mark.)
Click the
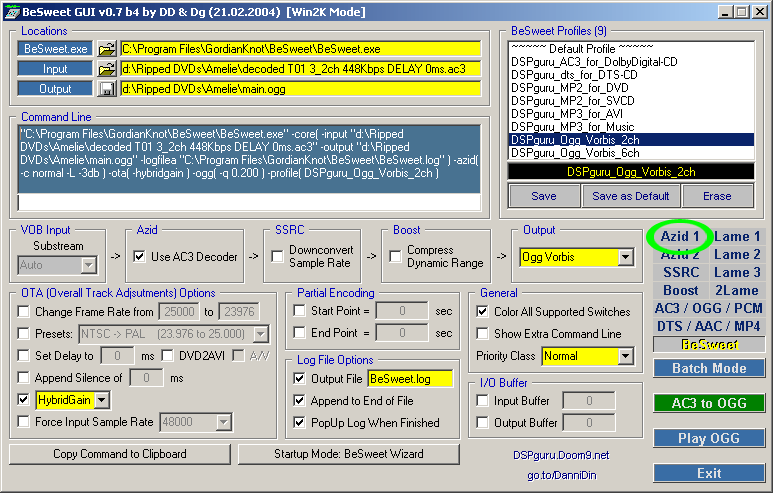 button and make the
following changes:
button and make the
following changes:


Click the
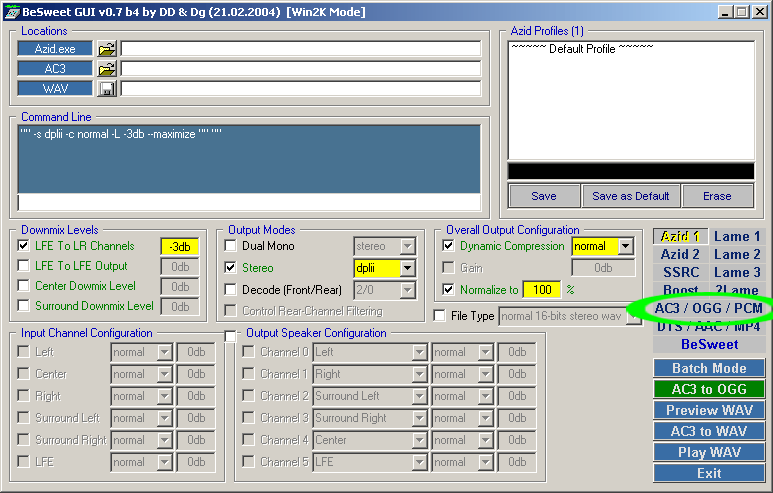 button.
If you are using 1 CD, select
 for the main audio
track,
for the main audio
track,
or
 for any commentary
tracks.
for any commentary
tracks.
If you are using 2
or more CDs, select
 for the main audio track,
or
for any commentary tracks.
If you're encoding the audio for a series of episodes,
follow the instructions in the
brown section.
If you're encoding the audio for a feature-length movie,
click
 and
ignore the brown section.
and
ignore the brown section.
Click
 .
.
Click
 .
.
Create a new ![]() text file in the ripping folder.
Open it, and press Ctrl+V to paste in the
command line.
text file in the ripping folder.
Open it, and press Ctrl+V to paste in the
command line.
Press Enter and then press Ctrl+V
again. Edit this second line so that the path to the
"input" file and the path for the "output" file both point
to the ripping folder for the second
episode.
Continue pasting and editing until there is a line for
each episode.
If there are commentary tracks, create a series of lines
for them as well. Only, be sure to change the "input" name
to the correct .ac3 file name, and the "output" name to
commentary.ogg or something similarly
descriptive. Edit the quality value on commentary tracks to
read 0.001. The delay value will most likely
stay the same.
Save the text file and close it. Rename it to
![]() audio.bat and
double-click it.
audio.bat and
double-click it.

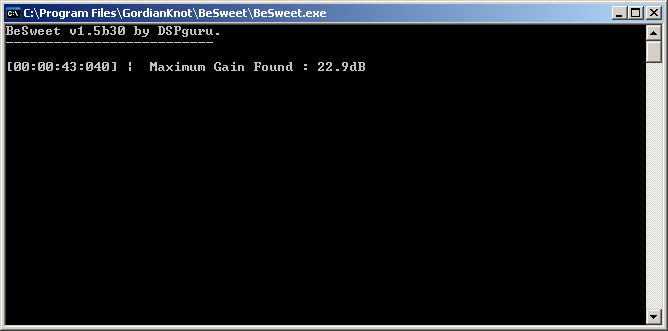
BeSweet will make two passes for each audio file--the
first to determine the
max gain, and the second
to encode the audio. It will take about 30 to 45 minutes
per track, depending on the speed of your CPU and the
length of the audio.
If you're encoding the audio for a feature-length movie,
repeat the process for each additional track.

Preview the .ogg file(s) in ![]() VLC Media
Player to make sure there are no glitches, and to
make sure the file names correspond to their content.
VLC Media
Player to make sure there are no glitches, and to
make sure the file names correspond to their content.
Close BeSweet and proceed to the next stage.
.

